Structeezy Code Parser
Since version 1.2, Structeezy has a built-in code parser that allows you to easily create your structure skeleton from raw html.
The parser is used by the Iconify integration to create Structures from the icon’s svg code.
Finding the Parser in Structeezy
You will find the Structeezy Parser in the Parser Tab, of the Structeezy Panel.
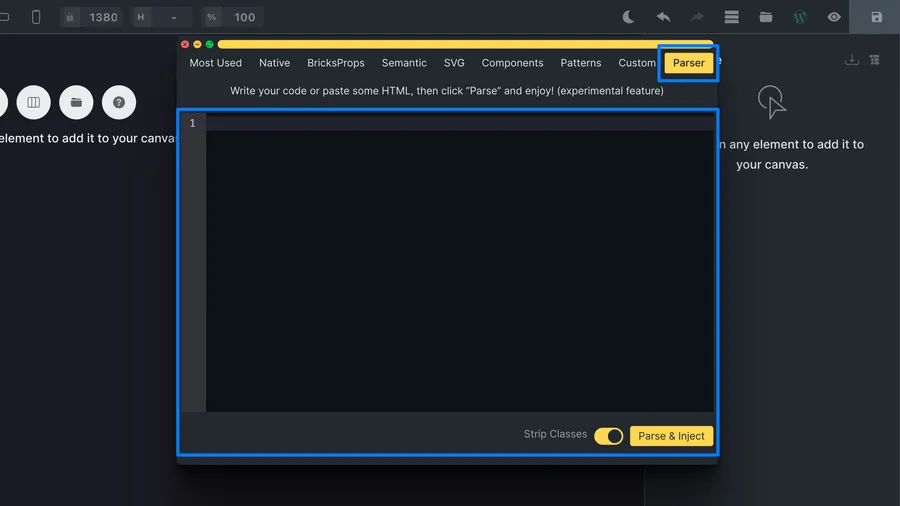
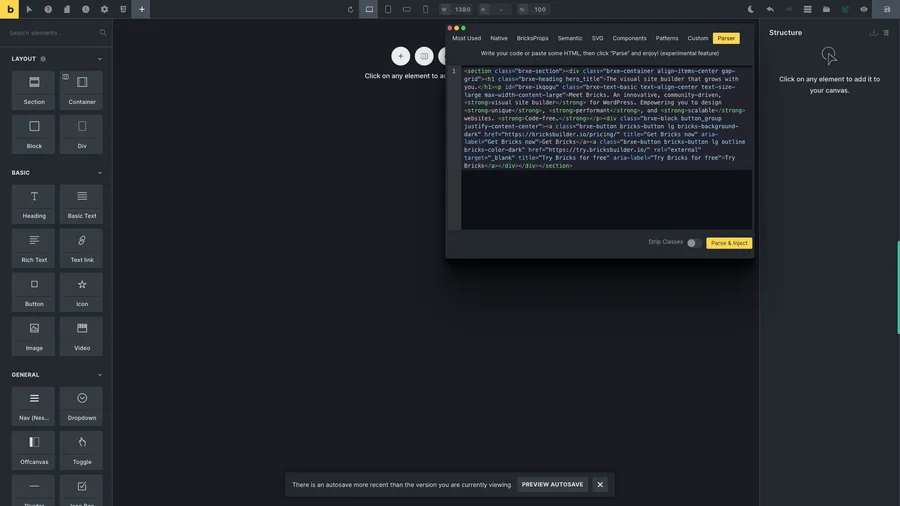
On the Parser component, you will find:
- A
code editor, powered by Codemirror, to enterHTMLorSVGcode. - A
Strip Classestoggle, off by default. This indicates to the parsed if it should register the source code’s classes asBricks Global Classes. - A
Parse & Injectbutton, that will parse the current code and create the corresponding elements in your structure tree.
Usage
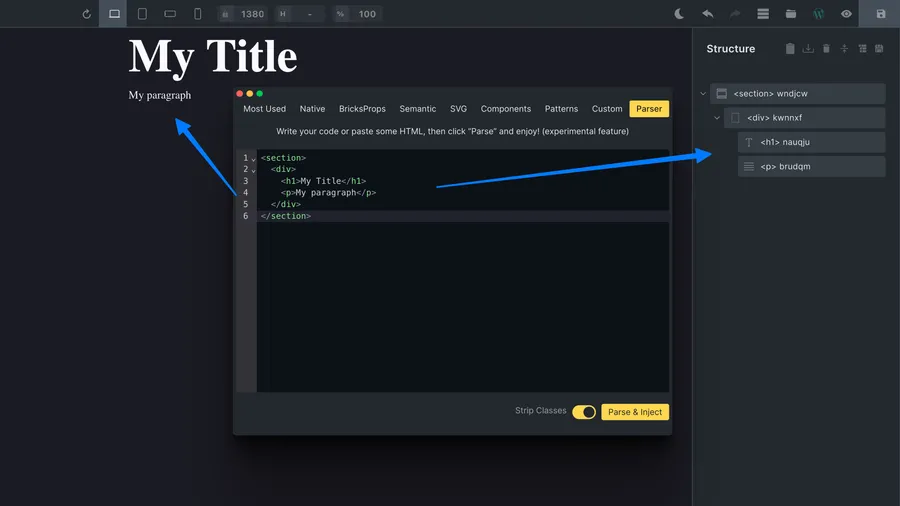
Write simple code
You can create a simple structure by writing the code in the editor. The parser will convert your code to Bricks elements, and all the elements inside it.
<section> <div> <h1>My Title</h1> <p>My paragraph</p> </div></section>Write your code in the editor, and click on Parse & Inject to create the structure.
Add classes and an Id to your elements
As a Bricks user, you probably use classes. Wether these are you own one, or from a CSS framework like o-props.
Structeezy allows you to add classes to your elements, and even an id attribute.
<section id="my-section" class="section o-height-full o-super-centered"> <div id="my-container" class="section__container o-flex-col"> <h1 id="my-heading" class="section__heading o-mrg-bl-3">My Title</h1> <p id="my-paragraph" class="section__paragraph o-thin">My paragraph</p> </div></section>Write your code in the editor, and click on Parse & Inject to create the structure.
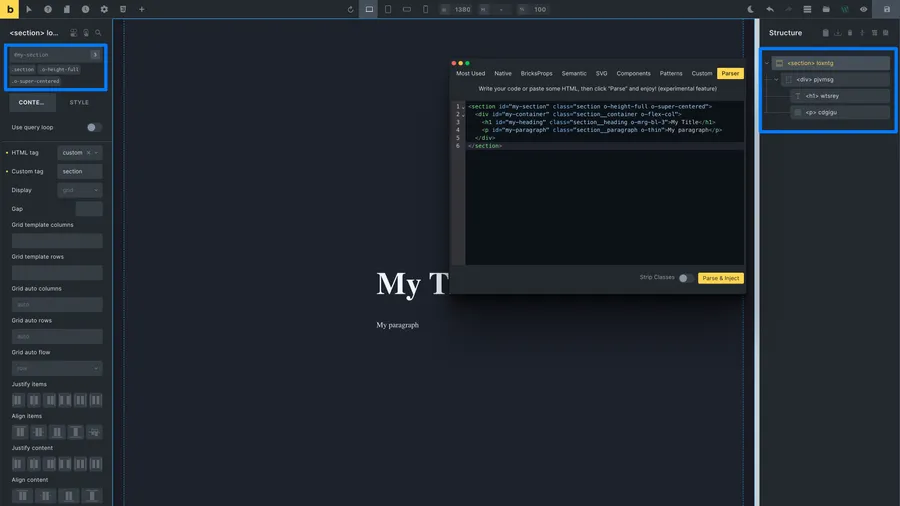
Structeezy will parse your code, and create the corresponding elements in your structure tree.
It will also register the classes as Bricks Global Classes and assign them to the corresponding elements.
Finally, it will add the id attribute to the corresponding elements.
Add custom attributes to your elements
You can also add custom attributes to your elements. These will be registered as Bricks custom attributes to the corresponding elements in your structure tree.
<section id="my-section" aria-labelledby="my-heading" data-attr="my-section-attr"> <div> <h1 id="my-heading">My Title</h1> <p>My paragraph</p> </div></section>Write your code in the editor, and click on Parse & Inject to create the structure.
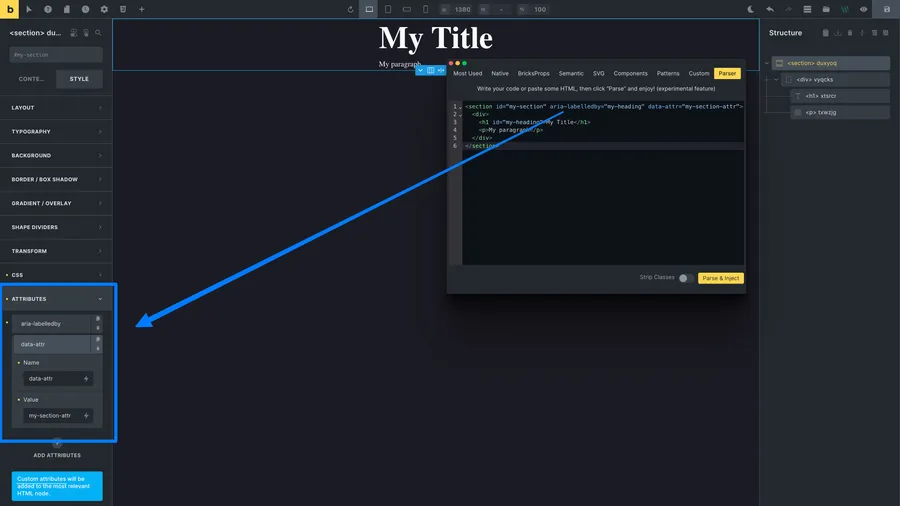
Structeezy will parse your code, and create the corresponding elements in your structure tree.
It will also create attributes and assign their name and values to the corresponding elements.
Add inline tags to your element content
It is not easy to add inline tags in Bricks, like <br />, <sup></sup>, <em></em>, etc.
Structeezy allows you to add inline tags to your element content, and will identify them as inline elements and insert them in your parent element content, giving the expected result.
<p> My paragraph<br />with a line break, and some <mark>marked text</mark> as well as super<sup>script</sup> and sub<sub>script</sub></p>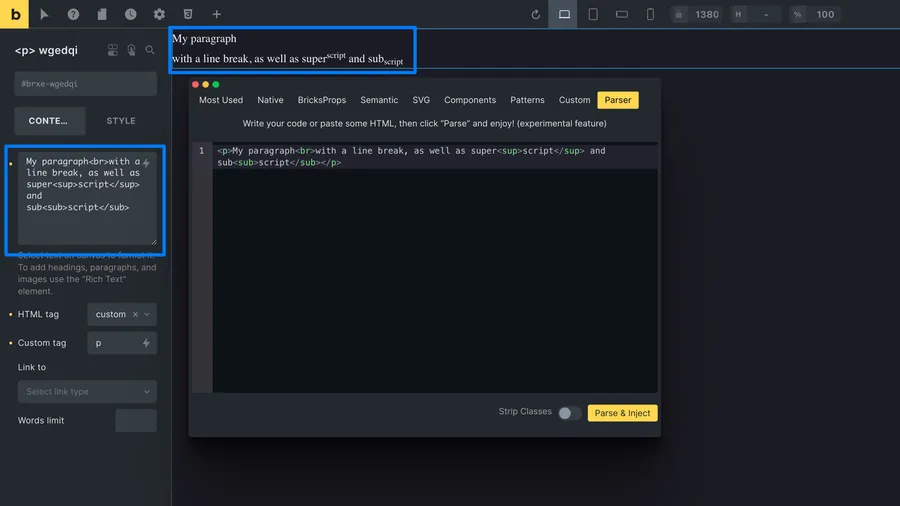
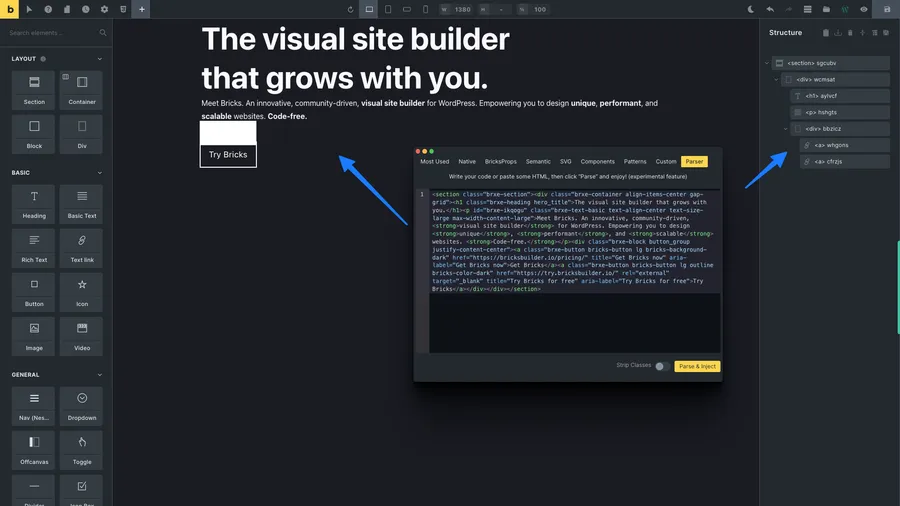
Paste any code from the web
You can paste any code from the web, and the parser will try to parse it.
for example, here is the hero section from the Bricks website.
<section class="brxe-section"> <div class="brxe-container align-items-center gap-grid"> <h1 class="brxe-heading hero_title"> The visual site builder that grows with you. </h1> <p id="brxe-ikqogu" class="brxe-text-basic text-align-center text-size-large max-width-content-large" > Meet Bricks. An innovative, community-driven, <strong>visual site builder</strong> for WordPress. Empowering you to design <strong>unique</strong>, <strong>performant</strong>, and <strong>scalable</strong> websites. <strong>Code-free.</strong> </p> <div class="brxe-block button_group justify-content-center"> <a class="brxe-button bricks-button lg bricks-background-dark" href="https://bricksbuilder.io/pricing/" title="Get Bricks now" aria-label="Get Bricks now" >Get Bricks</a ><a class="brxe-button bricks-button lg outline bricks-color-dark" href="https://try.bricksbuilder.io/" rel="external" target="_blank" title="Try Bricks for free" aria-label="Try Bricks for free" >Try Bricks</a > </div> </div></section>And Structeezy will parse it for you, and get you the HTML document Structure.
Add custom labels to your elements
You can add custom labels to your elements. These will be registered as Bricks custom labels to the corresponding elements in your structure tree.
To do so, Structeezy parser will look for a special sez attribute in your code, and use its value as the label.
<section sez="My Section"> <div sez="My Container"> <h1 sez="My Heading">My Title</h1> <p sez="My Paragraph">My paragraph</p> </div></section>Advanced Usage - Emmet
The parser code editor integrates Emmet, and you can use Emmet shortcuts to write your code. Emmet is a plugin for many popular text editors which greatly improves HTML & CSS workflow.
For example, you can write:
section#my-section>div#my-container>h1#my-heading+div#my-paragraphand Emmet will expand it to:
<section id="my-section"> <div id="my-container"> <h1 id="my-heading"></h1> <div id="my-paragraph"></div> </div></section>Emmet uses a syntax similar to CSS selectors for describing elements’ positions inside the generated tree and elements’ attributes.
General Principle
- Write an emmet shortcut in the editor. An emmet shortcut is a string of characters that describes the structure you want to create. It contains no whitespaces.
- Right after writing the shortcut, press the
Tabkey. This will expand the shortcut to the corresponding code. - Repeat the process to create the structure you want.
Elements
Any name that is not a shortcut is considered an element name. For example, section is an element name.
section<section></section>Nesting Operators
| Operator | Description |
|---|---|
> | Child operator. Creates a child element. |
+ | Sibling operator. Creates a sibling element. |
^ | Climb-up operator. Creates a parent element. |
* | Multiplication operator. Creates multiple elements. |
() | Grouping operator. Creates a group of elements. |
section>div>h1+div<section> <div> <h1></h1> <div></div> </div></section>Attribute Operators
| Operator | Description |
|---|---|
# | ID operator. Creates an ID attribute. |
. | Class operator. Creates a class attribute. |
[] | Attribute operator. Creates a custom attribute. |
section#my-section>div.section__container>h1.section__heading+div.section__paragraph<section id="my-section"> <div class="section__container"> <h1 class="section__heading"></h1> <div class="section__paragraph"></div> </div></section>Numbering Operators
| Operator | Description |
|---|---|
$ | Numbering operator. Creates a numbered element. |
section#my-section>div.section__container>h$*3.section__heading+div.section__paragraph<section id="my-section"> <div class="section__container"> <h1 class="section__heading"></h1> <h2 class="section__heading"></h2> <h3 class="section__heading"></h3> <div class="section__paragraph"></div> </div></section>Text Operators
| Operator | Description |
|---|---|
{} | Text operator. Creates text content. |
section#my-section>div.section__container>h1.section__heading{My Title}+div.section__paragraph{My paragraph}<section id="my-section"> <div class="section__container"> <h1 class="section__heading">My Title</h1> <div class="section__paragraph">My paragraph</div> </div></section>Emmet Cheat Sheet
| Shortcut | Description |
|---|---|
div | Creates a div element. |
div#my-div | Creates a div element with an id attribute. |
div.my-div | Creates a div element with a class attribute. |
div[my-attr] | Creates a div element with a my-attr attribute. |
div#my-div.my-div[my-attr] | Creates a div element with an id, a class and a my-attr attribute. |
div#my-div.my-div[my-attr]{My Text} | Creates a div element with an id, a class, a my-attr attribute and a text content. |
div#my-div.my-div[my-attr]{My Text}+div#my-div.my-div[my-attr]{My Text} | Creates two div elements with an id, a class, a my-attr attribute and a text content. |
For more information about Emmet and Emmet syntax, please refer to the Emmet documentation.