Quick Start Guide
Step 1: Installation
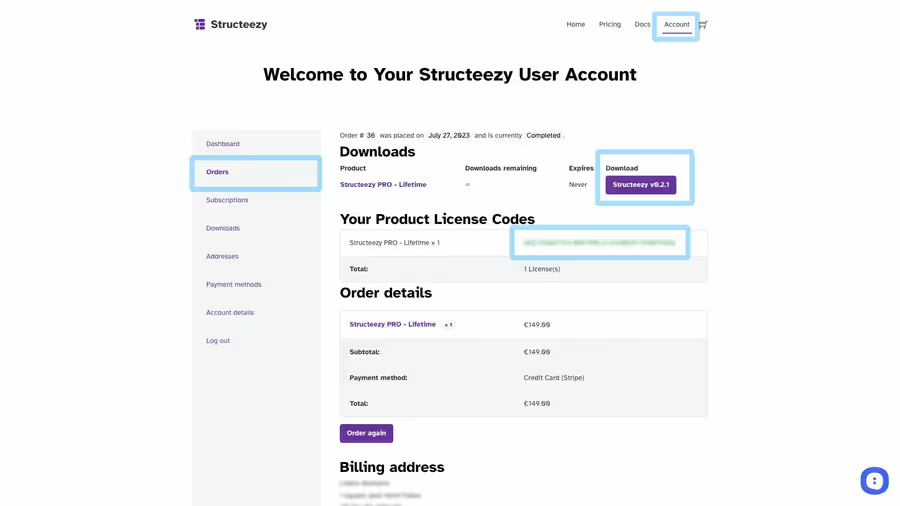
- Purchase and download Structeezy from our website.
- Log in to your WordPress admin panel.
- Go to “Plugins” > “Add New.”
- Click on the “Upload Plugin” button and select the downloaded Structeezy zip file.
- Click “Install Now” and then “Activate” to activate the plugin.
Step 2: Accessing Structeezy Dashboard
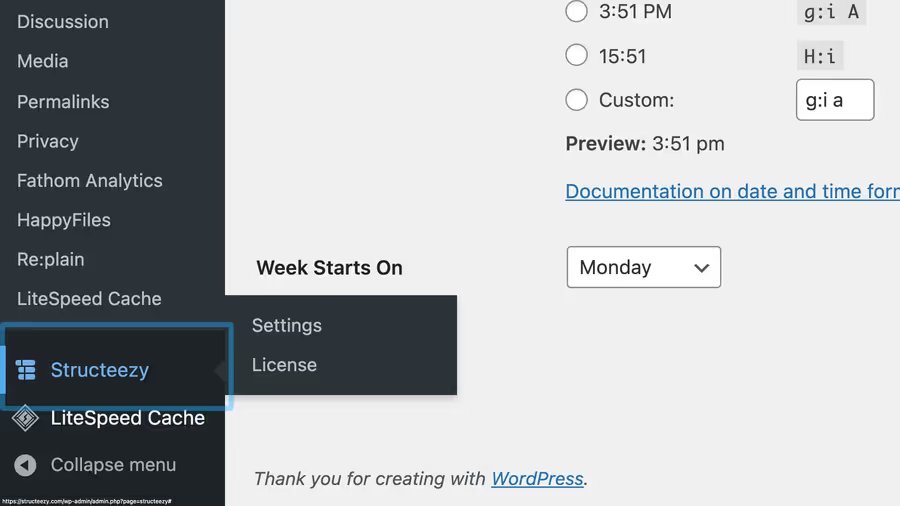
- Once activated, you’ll find the Structeezy dashboard on the left-hand side menu in your WordPress admin panel.
- Click on “Structeezy” to access the plugin’s main settings and features.
Step 3: General Preferences
Appearance
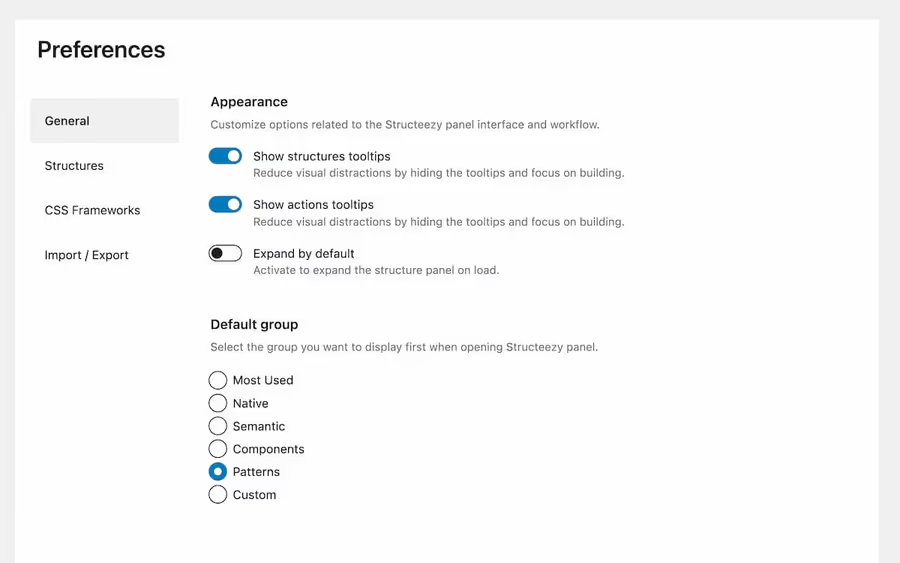
- Show structures tooltips on by default
Decide if you want to display tooltips on hover for the structures in the Structeezy panel. - Show actions tooltips on by default
Decide if you want to display tooltips on hover for the action buttons (show / hide / delete) in the Structeezy panel. - Expand by default off by default
This option allows to decide if the Structeezy panel is expanded or not by default. - Default group “Native” by default
Choose which group you want to be displayed first when opening Structeezy panel.
Structures
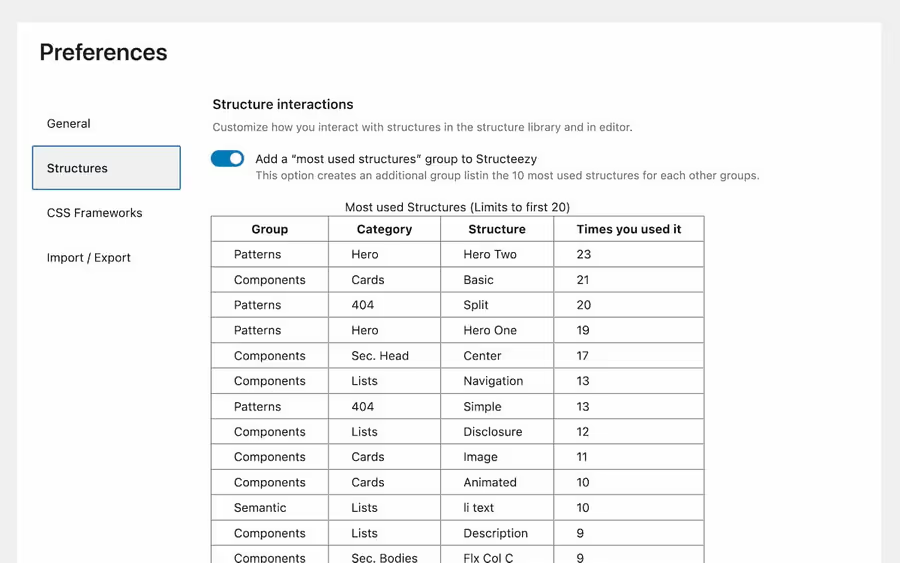
- Add a “most used structures” group to Structeezy on by default
Structeezy keeps track of the usage of your structures and displays the most used ones in a dedicated group. - Most used Structures Table
Displays the 20 most used structures in a table sorted in descending order. - Download all counters
Download a.jsonfile containing all counters. - Reset counters
Clear all counters and start from 0.
CSS Frameworks
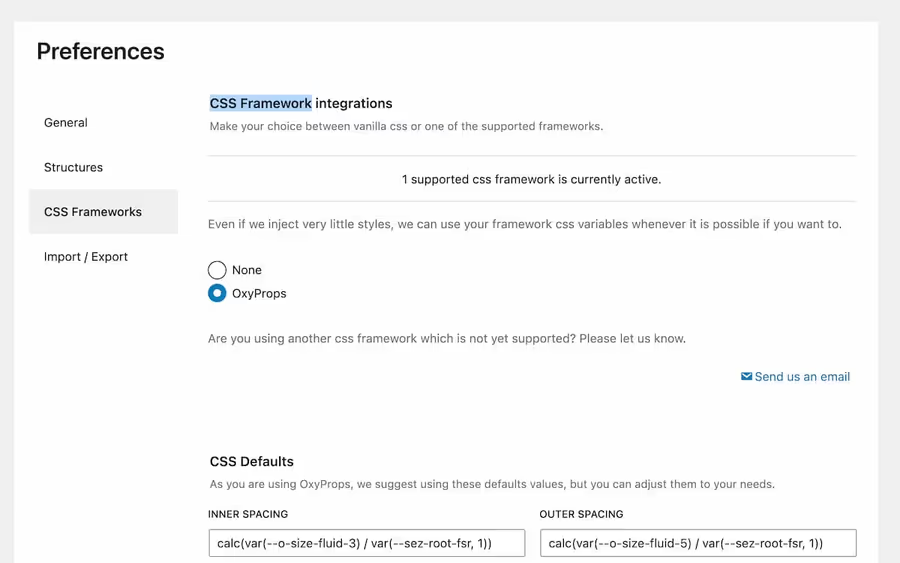
-
CSS Framework integrations “None” by default
Structeezy can detect the following CSS frameworks:
- Automatic.css
- CoreFramework
- OxyProps Lite
- OxyProps
If you are using one of these frameworks, you can select it here and Structeezy will automatically use css variables from the framework in your structures.
-
CSS Defaults Vanilla css values by default
Structeezy will use the values defined here as default values when necessary in your structures.
If you select a CSS framework, Structeezy will suggest default values from the framework.
Step 3: Creating Your First Structure
- In the Bricks editor, right-click on an element.
- On the Structeezy menu item click the floppy disk.
- Choose a category and Give your structure a name.
- You can add an optional tooltip.
- Once your structure is ready, click “Save Structure.”
Step 4: Reusing Your Structures
- After saving your structure, you can easily reuse it on any page or post.
- Edit the page/post with Bricks Builder.
- Open the “Structeezy” panel and naviigat to the Custom tab to access your saved structures.
- Select the desired structure and add it to your current page.
Step 5: Managing Your Structures
- To manage your saved structures, go to the Structeezy Panel and click “Custom”
- Here, you can hide or delete.
- You can export your structures for future use from the Structeezy dashboard.
Step 6: Collaborating and Sharing
- Structeezy allows you to share your structures with other team members or clients.
- In the Structeezy dashboard, click on “Import / Export” and select the structures.
- Click the “Download” button and you will get a Structeezy
.jsonfile. - Import the file in any Bricks + Structeezy install.
Step 8: Getting Help
- For any questions or issues, visit our support page or community forum.
- Our team is ready to assist you in making the most of Structeezy.
Congratulations! 🎉 You’ve completed the quick start guide for Structeezy. Now you’re all set to create, save, and reuse amazing structures with ease, saving time and elevating your web design workflow. Happy designing!